Showing posts with label roses. Show all posts

Tuesday, July 26, 2016

The Hex River Valley - Part 1


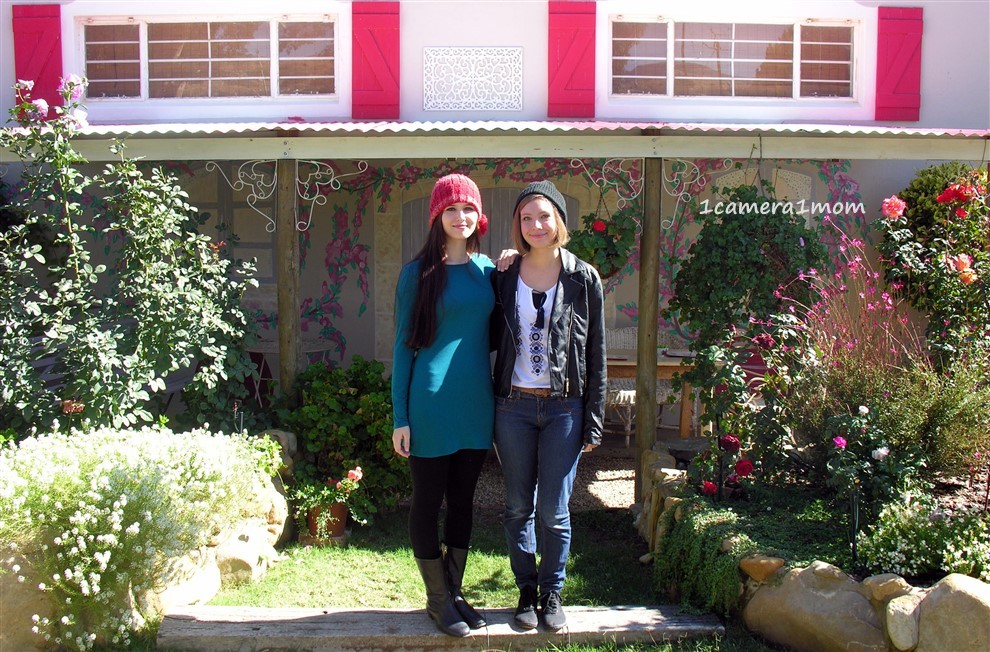
The weekend before Mother's Day, we took a drive to the Hex River Valley. It was Autumn here, below the Equator. We had a lovely sunny day and enjoyed the rose garden at our favorite farm stall. I actually thought that I'd share this outing sooner, but I always have great places to blog about that it's hard to keep up. We are really blessed to live in such a beautiful part of the world, in the heart of South Africa's wine country.

This blog is best viewed in Google Chrome.
Click on the images to enlarge them.
Trust me, it's worth it!

Sisters: Samantha, Amanda, Jessica

The Hex River Valley

Vineyards

Our Favorite Farm Stall from the Road

Sisters in the Rose Garden at the Farm Stall

Amanda

Jessica
Mom and Daughters


*********************

I'm also on Instagram.
Ich bin auch auf Instagram.


Tina Morley
All original photographs by Tina Morley
unless stated otherwise. 1camera1mom is
mostly in English mit ein bisschen Deutsch.

Related post:
Favorite Farm Stall

Wednesday, May 2, 2012

Simplicity – 14

This is my last post that I’ll be doing in this series. This has been an experiment with Picasa 3, which is free desktop software that runs on Windows, and it has been quite a journey. I think this is a great photo editing tool to finish off with. I love the dynamic and modern twist that it gives my image. I used Posterize, which has 3 slide-bars, namely Number of Colors, Detail and Fade. I adjusted all 3 of these until I was satisfied with the result.

Just because I decided to stop at this point doesn’t mean that I used up all the editing tools that Picasa 3 has to offer. There are still more to choose from, so check them out and have fun editing your images. I’m really looking forward to hearing from you so please leave a comment below stating which your favorite one in this series was. Stay tuned tomorrow for a brand new series.

Monday, April 30, 2012

Simplicity – 13

I was very happy with the way my roses turned out this time. I first got rid of the thin black irrigation pipe that was snaking out of the wine barrel using Retouch in Picasa 3. You can view my previous pictures to see what it looked like. I’m curious how many people actually noticed it before I took it away. The Retouch application takes a little getting used to. If you apply a lot of patches and then decide you did too many patches, you can click Undo Patch quite a few times. This application seems to have a long memory. If you undo more than you meant to, then you just click the Redo Patch until you’re happy. If you don’t want any of your changes, then just click Reset and start again. Once I was satisfied with the Retouch application, I added Cross Process and that was it.

Sunday, April 29, 2012

Simplicity – 12


In my previous post, I turned my roses black and white using the Holga-ish application in Picasa 3. Here they are also in black and white, but with a different application. This time I used the B&W application and added a bit of Boost. I think this combination worked better on my photo.

Saturday, April 28, 2012

Simplicity – 11


Here are 3 images using the same application as a starting point. I achieved the white roses with shadowed borders using Holga-ish in Picasa 3. When you click on Holga-ish, you will see 3 slide-bars, Blur Edges, Grain and Fade.


If you want a black and white image, then don’t use any of the Fade slide-bar. To get my roses in black, I added Invert Colors.

If you want your roses to have color, then use the Fade slide-bar. I adjusted mine to the middle. Then I added Sharpen and a bit of Vignette for the shadowed borders.

I hope you’ve enjoyed my 3 images in Holga-ish. Don’t forget to choose a favorite application in this series once I’m done. I'm looking forward to reading your comments.

What is Picasa?

Picasa is photo editing, desktop software that runs on Windows and the best part is that it’s for free. Go to download if you want it on your computer and learn more if you want to read a review on it.

Monday, April 23, 2012

Simplicity – 8

How to Make Your Own Coloring Paper:

Today I’m going to share with you how to make coloring paper using your own images. You can do this easily in Picasa 3. Not only is it easy, it’s also for free, except for the ink and paper that you will use to print on. What makes this a cool editing tool is that you can give your child personalized coloring pages. It can be pictures of your son, daughter, grandchild, favorite pet, or a holiday you took together. All you need is a special child in your life, a story in your photograph and the rest is making memories by coloring.

Here’s what you do: click on the Pencil Sketch button in Picasa 3. It will open to reveal three bars, one for Radius, one for Strength and one for Fade. You can adjust any of these three to get the effect that you want. I did not use the Fade bar on my image, as it brings the original color back into the picture. I wanted to keep my photo in black and white.

I wish you lots of fun making your own personalized coloring paper!

If you want to get the free download for Picasa 3 or read a review on it, then go to my post “Being Herself – 3.”

When I’ve completed this series, please let me know which your favorite picture was. You can do the same with my earlier posts. I have a series on “Being Herself” and another one on "Kids with Animals.” Perhaps you have a favorite amongst those as well. I’d love to hear from you.

Sunday, April 22, 2012

Simplicity - 7


These four colorful images were all done using the same editing tool. I used Heat Map in Picasa 3 to get these results. There is a Hue bar for Heat Map that when moved from left to right changes the colors of the image. I chose just four pictures to share with you from the many different options available using this technique.


Saturday, April 21, 2012

Simplicity – 6


How’s this for a fun effect? I chose Pixelate in Picasa 3 and adjusted the Pixel Size and Blend Mode until I was happy with the result. For more information about Picasa 3, you can check out my blog post “Being Herself –3.”

Friday, April 20, 2012

Simplicity – 5


No flora has been harmed in any way during this experiment of mine. The roses from my garden have not felt a thing during this process of altering their image. This time I used HDR-ish and then added Vignette in Picasa 3. Each technique certainly creates a new look to my photo. Once I’m finished with this series, I’d love to hear which look was your favorite.

Thursday, April 19, 2012

Simplicity - 4


I’ve noticed that the petals of these roses, called Simplicity, have a natural antique look about them once the roses are fully opened. That got me to thinking that the 1960s look in Picasa 3 would work well on this image. So, I clicked on the 1960s editing tool and then chose a dark brown color for the corners. I must say, I’m very satisfied with the result. I hope you are having fun with your photos too.

Wednesday, April 18, 2012

Simplicity – 3

I hope you like the roses from my garden, because you’re going to see them a few more times before I’ve finished this series. At the moment, I’m demonstrating different editing techniques in Picasa 3 using the same image. I said that I would try techniques that I normally wouldn’t use on a picture of mine, but today I’m demonstrating popular editing tools that you might like to use on your favorite photos.

My original photo in Simplicity – 1 was not edited. In this post you can see how I took the “raw” image and gave it more color. I chose the word raw, because in my mind I’m imagining corn on the cob or broccoli before the vegetables have been cooked. Once they’re cooked just right, their color shows more brightly.

Editing a photo is easy. I used Sharpen, Saturation and Vignette in that order. It took me only a few clicks with my mouse and I was done. I love roses no matter what their color and these ones are no exception.

Monday, April 16, 2012

Simplicity – 2


I had a lot of fun with this image. I’m trying out the editing tools in Picasa 3 that I normally wouldn’t use on my photos. My soft pink Simplicity roses have now changed a crazy green color. I layered two techniques to get this result. It was really easy. All I did was to choose Invert Colors and then Lomo-ish and I was done, nothing to it. If you want to see what these roses looked like before I edited them, just scroll down to the previous post, “Simplicity– 1.” If you want to learn more about Picasa 3 then check out “Being Herself –3.”

Sunday, April 15, 2012

Simplicity – 1


These roses, named Simplicity, are from my garden. They are planted inside an old wine barrel. I have a few of these barrels lining our concrete driveway.

I took this picture in March. It’s autumn here in South Africa, south of the equator. My flowers all around my garden have been blooming, so it looks like spring.

All I did to this image was to crop it and resize it smaller. I’m going to play around with some of the fun photo editing techniques that I normally wouldn’t use. You’ll get to see these roses take on a different look every day, but today they are their original, beautiful selves.

Total Pageviews

Recommended Sites

To be added

Recommended Galleries

To be added